How to set up GrapheneOS
From a fresh install to a ready-to-use phone.
· 24 min read
By Sky · @countrmeasure

The Google integrations embedded in my Android phones always made me feel uncomfortable, and getting Google out of my phone always seemed to me like the holy grail of mobile.
Although I’d wanted to do it for a long time, until I came across GrapheneOS it was always too hard and involved sacrificing too much functionality.
GrapheneOS is the first solution I’ve found for the Google problem that feels robust, polished and complete.
It describes itself as “an open source privacy and security focused mobile OS with Android app compatibility”. My understanding of mobile operating systems is not very sophisticated though, so I just think of it as Android with the Google creepiness removed and extra security added in.
This is a step-by-step guide to setting up a Pixel 3a with it. We’ll take a fresh GrapheneOS installation – which is intentionally bare-bones – and turn it into an elegant device which has all the functionality you need for daily use and yet doesn’t compromise on privacy and security.
Let’s see what that looks like.
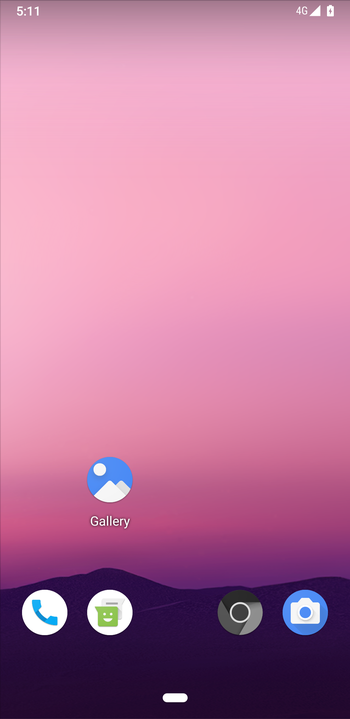
Before
This is what we’ll start with:
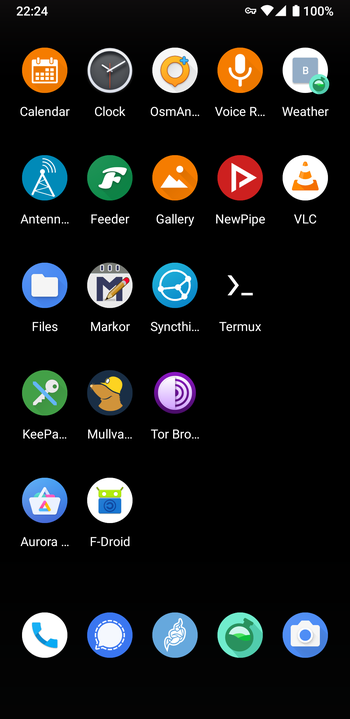
After
We’ll install and set up apps which provide functionality including:
-
an always-on VPN
-
secure messaging, secure voice calls and secure video calls
-
ad-blocking
-
Tor
-
offline maps & navigation
We’ll also tweak some system settings to make make the phone nicer to use.
When we’re done, it’ll look something like this:
Let’s get started.
Step 0: Fit a case and screen protector
Sooner or later we all drop our phone or carry it in the same pocket as our keys. Protect it with a case and screen protector and it will last longer and stay in better condition.
This is a non-technical but important part of setting up a phone. Don’t put it off for later or it may never happen.
For the Pixel 3a, I can recommend the Spigen Tough Armor case and the Spigen GLAS.tR SLIM screen protector. They’re not cheap, but the’re good quality. I fitted mine more than six months ago and they continue to impress me.
Step 1: Install GrapheneOS
I’m not going to go into any detail about how to install GrapheneOS. The GrapheneOS installation guide explains the process well, so follow it and come back here when you’re done.
Once you’ve finished installing GrapheneOS, keep your phone connected to your
computer because we’ll be using adb at different times throughout the setup
process. This will require you to have USB debugging toggled to on in
Settings > System > Advanced > Developer options.
Step 2: Configure Vanadium
Vanadium is the browser bundled with GrapheneOS.
We want to make sure it can install apps, and set its default search engine.
-
Open the App Drawer by swiping up from the bottom of the screen.
-
Tap the Settings icon.
-
Go to Settings > Apps and notifications > Advanced > Special app access > Install unknown apps > Vanadium.
-
Toggle Allow from this source to on.
-
Open Vanadium by tapping on the greyscale Chromium icon.
-
Inside Vanadium go to Settings > Search engine, then select DuckDuckGo.
Step 3: Connect to wi-fi
-
Open the Quick Settings menu by swiping down once from the top of the screen.
-
Long-press on the wi-fi icon, toggle Use Wi-Fi to on, and connect to a wi-fi network.
Step 4: Install F-Droid
F-Droid is a catalogue of free open-source (FOSS) Android apps. It’s like the Google Play Store, but all the apps it contains are FOSS. There are a lot of excellent apps in there – more than I realised before I started using it.
You’ll need F-Droid to install apps later in this guide, and you’ll also need it over time to find and install apps as the need for them arises.
-
In Vanadium, browse to https://f-droid.org.
-
Tap the DOWNLOAD F-DROID button.
-
Tap Download in the Download file dialog.
-
Tap OK in the This type of file can harm your device notification.
-
Once the FDroid.apk file has downloaded, tap Open in the notification.
-
Tap INSTALL in the F-Droid Do you want to install this application? dialog.
-
Tap DONE in the F-Droid App installed dialog.
Decision 1: Will you use a VPN?
As you set up your phone, there are a few important decisions to make. When we reach each one I’ll flag it and explain what you might want to consider. Whether to use a VPN is your first decision.
If you don’t use a VPN, your mobile/cell carrier will log your use of mobile/cell data, and the ISP of every wi-fi you connect to will log your use of wi-fi data. Increasingly, governments around the world are requiring these logs to be kept, and kept for years, which is a troubling practice.
GrapheneOS will work just fine without a VPN, but in light of this I can’t imagine not using one.
I recommend in the strongest possible terms that you use a VPN and set it to be always-on so that 100% of your internet traffic runs through it.
Decision 2: Which VPN will you use?
The well-regarded PrivacyTools recommends three VPN services and provides a useful summary of what each one offers. All three have no-logging policies, meaning that they undertake not to record your traffic as it goes into and out of their servers.
I use Mullvad, partly because it’s one of PrivacyTools recommendations and partly because Mozilla chose them to power Mozilla VPN, which seems like a meaningful stamp of approval.
I find the Mullvad service to be stable and fast. I can recommend it.
A VPN alternative you may come across is the Orbot app. It sends traffic through the Tor network, so it doesn’t require you to trust that your VPN truly isn’t keeping logs. I really love the concept of Orbot, but because it uses Tor it slows down browsing to such a frustrating degree that I don’t use it and I don’t recommend it for users who don’t have specific and uncommon privacy needs.
Step 5: Install the VPN app
Install the app of your VPN service – for me that’s Mullvad VPN – via F-Droid, and set it to be always-on.
Alternatively you can install the WireGuard app or OpenVPN for Android app and load your VPN configurations into them. To me though, that approach is clunkier than it needs to be. Considering that you’re trusting your VPN service with all of your internet traffic, I think it’s reasonable and much more convenient to trust their FOSS app to seamlessly manage your VPN connection.
-
In F-Droid, find and install Mullvad VPN.
-
In the F-Droid For your security, your phone is not allowed to install unknown apps from the source dialog, tap SETTINGS.
-
Toggle Allow from this source to on, then tap the back arrow in the top left corner of the screen.
-
In the Mullvad VPN Do you want to install this application? dialog, tap INSTALL.
-
Open Mullvad VPN.
-
If you already have a Mullvad account, login with your account number. If you don’t have a Mullvad account, tap Create account at the bottom of the screen, record your new account number somewhere secure, then tap Buy credit at the bottom of the screen and buy credit.
-
Select the country of the VPN connection you want to use.
-
Tap OK in the Connection request dialog.
-
After a few seconds you should see SECURE CONNECTION in green text above the country you chose in the middle of the screen.
-
Tap the gear icon in the top right corner of the screen
-
Select Preferences and toggle Auto-connect to on.
-
Open the App Drawer and tap the Settings icon.
-
Go to Settings > Network and Internet > Advanced > VPN.
-
Tap the gear icon at the right of Mullvad VPN
-
Toggle Always-on VPN to on.
-
Toggle Block connections without VPN to on.
-
Tap TURN ON in the Require VPN connection? dialog.
-
Open the App Drawer, long-press on Mullvad VPN, then tap the App info popover which appears.
-
Tap Notifications and toggle Show notifications to off.
When notifications are on, you’ll always see a Mullvad icon reminding you that the app is running. The icon appears both on the lock screen and in the notification bar of the home screen. I find this icon distracting, so I prefer not to see it. Don’t feel bad about switching off this app’s notifications because GrapheneOS itself will take care of making sure that the VPN is always on, and will warn you if and when it isn’t.
Decision 3: How will you block ads?
You can block ads by either:
-
setting up system-wide ad-blocking using Private DNS, or
-
using a browser with built-in ad-blocking.
Neither option is perfect, and each has different drawbacks.
Private DNS
You can set Private DNS to something like dns.adguard.com as described
in the system-wide ad-blocking section of the GrapheneOS FAQ.
This will stop ads appearing in your browser(s) and apps. It’s easy and very effective.
The problem with this approach is that the DNS resolver, for example AdGuard, will see every URL your browser and apps try to connect to. This means one more organisation having visibility into your internet use.
To be worth using, I think an ad-blocking DNS resolver would need to be run on a commercial scale, have a robust no-logging policy and be located outside the Five Eyes. None of the DNS resolvers listed by PrivacyTools ticks all these boxes.
Even if you use a VPN, setting a Private DNS will cause all DNS resolution to happen outside the VPN, leaking that information.
The advice from the custom DNS resolvers section of the GrapehenOS FAQ is “If you’re using a VPN, you should consider using the standard DNS service provided by the VPN service to avoid standing out from other users.”
I use a VPN, and I recommend you do, so to me all of this adds up to a convincing argument not to use an ad-blocking DNS resolver.
Ad-blocking browser
My preferred option is to use an ad-blocking browser.
This has the advantage of allowing your DNS resolution to happen through your VPN (if you use one, and you should), so you’re not leaking your DNS queries.
The problem with it, however, is that it doesn’t block ads in your apps. I find that this isn’t a problem in practice though, because I don’t use any apps which have ads.
Step 6: Install Bromite
You can skip this step if you’ve decided to use a DNS resolver for ad-blocking.
Bromite is a Chromium browser modified with ad-blocking and extra privacy features.
We’ll use it as our default browser.
-
In F-Droid, tap Settings > Repositories, then tap the + button in the top right corner of the screen. You’ll see the Add new repository dialog.
-
In Vanadium, browse to https://bromite.org/fdroid.
-
On that page, just below the QR code, you’ll find the address and fingerprint of the Bromite F-Droid repository. Copy and paste them into F-Droid’s Add new repository form.
-
Tap ADD in the form.
-
Go to the F-Droid Latest screen, search for Bromite, then install it.
-
Open the App Drawer and tap the Settings icon.
-
Go to Settings > Apps & notifications > Advanced > Special app access > Install unknown apps > Bromite.
-
Toggle Allow from this source to on.
-
Open Bromite and inside it go to Settings > Search engine, then select DuckDuckGo.
Step 7: Install Signal
Signal is a secure messaging app which can seamlessly manage all your messaging, both encrypted messages and conventional texts. It can also make encrypted voice calls.
We’ll use it as a drop-in replacement for the default Messaging app.
-
In Bromite, browse to https://signal.org/android/apk/.
-
Scroll down past the Danger zone heading and then tap the Download button.
-
Tap Download in the Download file dialog.
-
Tap OK in the This type of file can harm your device notification.
-
Once the Signal-website-univeral-release…apk file has downloaded, tap Open in the notification.
-
Tap INSTALL in the Signal Do you want to install this application? dialog.
-
Tap DONE in the Signal App installed dialog.
-
Go to Settings > Apps and notifications > Advanced > Special app access > Install unknown apps > Signal.
-
Toggle Allow from this source to on.
Signal needs this permission to be able to update itself.
-
Open the App Drawer by swiping up from the bottom of the screen, long-press on Signal, then tap the App info popover which appears.
-
Tap Permissions and move Camera, Contacts, Microphone, Phone, SMS and Storage from the DENIED list to the ALLOWED list.
-
Tap the back arrow at the top left of the screen.
-
Tap Notifications and toggle Other to off.
When this setting is on you’ll see an icon reminding you that Signal is running in the background. The icon appears both on the lock screen and in the notification bar of the home screen. I find this icon distracting, so I prefer not to see it.
Step 8: Transfer Signal messages from your old phone
You can skip this step if you don’t have Signal messages that you want to transfer from your old phone.
If you’re already a Signal user and want to transfer your existing Signal messages to this phone, you first need to make a Signal backup following their instructions, then continue on.
On your computer
Here’s how I copied the Signal backup directory from my old phone to my computer:
$ adb pull /sdcard/Signal
Then, from the same directory as the previous command, this copied it onto the Pixel 3a:
$ adb push Signal /sdcard/
Step 9: Register and configure Signal
-
Put your SIM card into the phone. Signal needs this to register the new device.
-
Open the Signal app and follow its setup/registration process. If you have a backup to restore, make sure you select the RESTORE BACKUP button when it’s presented on the Restore from backup? screen.
-
After the registration step in which you enter your name, Signal shows some action confirmations towards the top of the screen in white text on a blue background.
-
Tap the Use as default SMS app action confirmation, then select Signal in the dialog which appears, then tap SET AS DEFAULT.
-
Tap the Import system SMS action confirmation.
-
Tap the x in the top right corner of the Invite your friends! action confirmation.
-
Tap the Optimize for missing Play Services action confirmation then tap ALLOW in the Let app always run the background? dialog.
Step 10: Install Tor Browser
Tor Browser is a browser which uses onion routing.
This is the gold standard for private web browsing.
-
In F-Droid, go to Settings > Repositories.
-
Toggle Guardian Project to on.
-
Go to the F-Droid Latest screen, search for Tor Browser and install it.
-
Open the App Drawer and tap the Settings icon.
-
Go to Settings > Apps and notifications > Default apps > Browser app then tap Bromite.
Installing Tor Browser unsets the default browser, so this sets it.
Step 11: Install OsmAnd~
OsmAnd~ is an offline maps and navigation app.
-
In F-Droid, find and install Maps & GPS Navigation OsmAnd+ (known as OsmAnd~).
-
Open the App Drawer, long-press on OsmAnd~, then tap the App info popover which appears.
-
Tap Permissions and move Location and Storage from the DENIED list to the ALLOWED list. For Location, choose Only while app is in use.
-
Open OsmAnd~.
-
Tap the GET STARTED button.
-
Tap SKIP on the Download map screen, then tap SELECT in the Skip downloading maps dialog.
-
On the Map screens that follow keep selecting your location as the options become more specific.
-
When you see a Standard map option, tap it.
This will download a map for your area. OsmAnd~ is an offline tool, so it needs to download maps of areas in which it will be used.
-
In the World overview map notification which appears next, tap DOWNLOAD.
Step 12: Install Aurora Store
Aurora Store is a FOSS client for the Google Play Store.
You can use it to install apps which are available for free in the Google Play Store.
-
In F-Droid, find and install Aurora Store.
-
Open the App Drawer, long-press on Aurora Store, then tap the App info popover which appears.
-
Tap Permissions and move Storage from the DENIED list to the ALLOWED list.
-
Open the App Drawer and tap the Settings icon.
-
Go to Settings > Apps and notifications > Advanced > Special app access > Install unknown apps > Aurora Store.
-
Toggle Allow from this source to on.
-
Open Aurora Store.
-
On the Welcome screen tap NEXT.
-
On the Accounts screen tap ANONYMOUS.
This will allow you to install apps without having to authenticate to the Play Store with a Google account of your own.
Step 13: Add a weather shortcut
As a rule, weather apps just repackage data from national weather services.
Rather than installing a weather app, we’ll go straight to the source and keep it simple by adding a shortcut to the relevant weather service to the home screen.
-
In Bromite, browse to your national weather service, then navigate to the forecast page for your city or region.
-
Tap the 3 vertical dots icon in the top right corner of the screen and select Add to Home screen.
-
In the Add to Home Screen dialog, enter
Weatherand then tap Add. -
In the Add to Home Screen confirmation dialog, tap ADD AUTOMATICALLY.
Step 14: Remove unused apps from the App Drawer
Some apps which are bundled with GrapeheneOS are unlikely to be used often, so we’ll remove them from the App Drawer to keep it as uncluttered as possible.
One is Auditor which verifies the integrity of the operating system.
Others are Calendar, Gallery and PDF Viewer, because in the next step we’ll install alternatives to each of them which have more functionality.
-
Open the App Drawer.
-
Long-press on Auditor, then tap the App info popover which appears.
-
Tap FORCE STOP, then tap OK in the confirmation dialog.
-
Tap DISABLE, then tap DISABLE APP in the confirmation dialog.
-
Repeat this process for Calendar, Gallery and PDF Viewer.
Step 15: Install other apps from F-Droid
We’ll also install some other apps using F-Droid to provide various functionality.
Search for each one by name in F-Droid, then install it.
After you install each app, open it and approve the permissions it requests.
-
AntennaPod - Podcast manager and player.
-
Feeder - Feed reader.
-
Jitsi Meet - Video calling.
-
KeePassDX - Password manager.
-
Markor - Note taker.
-
MuPDF viewer - Document viewer.
-
NewPipe - YouTube frontend.
-
Simple Calendar Pro - Calendar.
-
Simple Gallery Pro - Photo and video gallery.
-
Syncthing - Decentralised file synchronisation.
-
Termux - Terminal emulator.
-
Voice Recorder - Audio recorder.
-
VLC - Media player.
Step 16: App settings improvements
Clock
-
Open the App Drawer and tap the Clock icon.
-
Tap the 3 vertical dots icon in the top right corner of the screen and select Settings.
-
Tap Gradually increase volume and select 30 seconds.
This provides a less jarring experience when waking up to an alarm.
-
Tap Start week on and select Monday.
Because the week starts on Monday, not Sunday.
Jitsi Meet
-
Open the App Drawer and tap the Jitsi Meet icon.
-
Tap the 3 horizonal lines icon in the top left corner of the screen and select Settings.
-
Type your first name, nickname or nom de guerre into the Display name field.
This identifies you in a call.
-
Toggle Start with audio muted to on.
If you leave this set to off, sooner or later you’ll find yourself in an awkward situation.
-
Toggle Start with video muted to on.
If you leave this set to off, sooner or later you’ll find yourself in an awkward situation.
Step 17: Device-wide settings improvements
I find that these modifications to the default settings make the phone feel more natural and more pleasant to use.
-
Settings > Battery - Toggle Battery percentage to on.
This displays the battery percentage next to the battery icon in the notification bar at the top of the screen.
-
Settings > Display > Adaptive brightness - Toggle Adaptive brightness to on.
This makes the screen brightness adapt to the environment, increasing in brighter conditions and decreasing in darker conditions.
-
Settings > Display > Advanced - Toggle Auto-rotate screen to on.
This rotates the screen when the phone is rotated.
-
Settings > Display > Advanced > Lock screen display - Toggle Always on to on.
This displays basic information and alerts on the screen when the phone is not in use. Switching it on reduces time between charges slightly, but it’s worth it. If you don’t turn this setting on, your phone’s screen will be entirely black when not in use, and the only way to check for alerts will be to wake it up, which gets annoying fast.
-
Settings > Display > Advanced > Lock screen display - Toggle New notifications to off.
This option wakes the screen on new notifications. It’s unnecessary and distracting when Always on is enabled, so switch it off.
-
Settings > Display > Advanced > Lock screen display - Toggle Show lockdown option to on.
This adds a Lockdown button to the power button menu. This button locks the phone immediately and deactivates fingerprint unlocking. To unlock the phone from this state, the PIN is required. Once unlocked with the PIN, fingerprint unlocking is re-enabled.
-
Settings > Display > Advanced > Lock screen display > Lift to check phone - Toggle Lift to check phone to off.
This option wakes the screen when the phone is picked up. I find it unnecessary when Always on is enabled, so switch it off.
-
Settings > Display > Night light - Tap Schedule and select Turns on from sunset to sunrise.
The makes the screen colour less blue at night.
-
Settings > Security > Fingerprint - Tap Fingerprint + PIN and follow the prompts.
This allows the phone to be unlocked with a fingerprint or PIN, which is much more convenient than a PIN alone.
Enrol the index finger of both hands so you can unlock the phone one-handed with either hand. Now you can touch the fingerprint sensor to wake your phone and unlock it in the one operation.
-
Settings > Sound > Advanced - Toggle all sliders under OTHER SOUNDS AND VIBRATIONS to off.
This makes your phone quieter to use.
-
Settings > System > Date & time - Toggle Use locale default to off.
This needs to be switched off to allow the 24 hour time format to be used.
-
Settings > System > Date & time - Toggle Use 24 hour format to on.
This will show a time as 21:28 rather than 9:28pm throughout the device.
-
Settings > System > Gestures > System navigation - Select Gesture navigation.
This provides more expressive gesture navigation.
-
Settings > System > Languages & input > Languages - Add English (Australia), then remove English (United States).
This is what I do, and you should modify this setting for your language.
-
Settings > System > Languages & input > Virtual keyboard > Android Keyboard (AOSP) > Appearance & Layouts > Theme - Select Material Dark.
This sets the keyboard to a dark theme which is easier on the eyes than a light theme.
-
Settings > System > Languages & input > Virtual keyboard > Android Keyboard (AOSP) > Preferences - Toggle Vibrate on keypress to off.
This turns off haptic feedback for keypresses on the keyboard.
-
Settings > System > Languages & input > Virtual keyboard > Android Keyboard (AOSP) > Text correction - Toggle Personalised suggestions to on.
This will build up a dictionary of autocomplete suggestions over time based on your personal language use.
Step 18: Set a wallpaper
I like to set a plain black wallpaper.
The file I use is a 1 pixel by 1 pixel black image called black.png.
On your computer
Download the black image file from the link above, then cd into the directory
you saved it to.
Copy it to the phone with:
$ adb push black.png /sdcard/Wallpaper/black.png
On your phone
-
Go to Settings > Display > Wallpaper, then tap Wallpapers.
-
Tap My photos.
-
Tap the 3 vertical dots icon in the top right corner of the screen and select Show internal storage.
-
Tap the 3 horizontal lines icon in the top left corner of the screen then tap Pixel 3a, then Wallpaper, then black.png.
-
Tap Set wallpaper at the top of the screen.
-
Select Home screen and lock screen in the Set wallpaper confirmation dialog.
Step 19: Configure the Quick Settings menu
-
Swipe down from the top of the phone twice to open the Quick Settings menu.
-
Tap the pencil icon in its lower left corner.
-
In the top row, put Wi-Fi, Hotspot, Bluetooth.
-
In the second row, put Dark theme, Location, Do Not Disturb.
-
In the third row, put Mobile data, Battery Saver, Aeroplane mode.
-
In the fourth row, put Torch, Night Light, Auto-rotate.
-
All other icons go in the DRAG HERE TO REMOVE section at the bottom of the screen.
-
Tap the back arrow at the top left of the screen.
Step 20: Set up your home screen
-
For each icon on your home screen, long-press on it, drag it to the far right side of the screen, wait for the next screen with the other app icons on it to appear, then place it on that screen. This will move all the icons to the one screen, and the screen which was to the right of the home screen now becomes the home screen.
-
Remove Messages from the home screen by long-pressing it, dragging it to the REMOVE text at the top of the screen and dropping it there. Then do the same for MuPDF and Vanadium.
-
Open the App Drawer.
-
Long-press on Clock, drag it upwards and then place it on the home screen. Then do the same with Files and Gallery.
-
In the Favourites Bar at the bottom of the screen, beside Phone , put Signal, Jitsi, Bromite, and Camera.
-
In the top row of the home screen put the general utility apps: Calendar, Clock, OsmAnd~, Voice Recorder and Weather.
-
In the second row of the home screen put the media apps: AntennaPod, Feeder, Gallery, NewPipe, and VLC.
-
In the third row of the home screen put the system utility apps: Files, Markor, Syncthing and Termux.
-
In the fourth row of the home screen put the privacy and security apps: KeePassDX, Mullvad VPN and Tor Browser.
-
In the fifth row of the home screen put the catalogue apps: Aurora Store and F-Droid.
Step 21: Set up Seedvault backups
Seedvault is an encrypted backup app which is bundled with GrapheneOS.
For this step, you’ll need a USB flash drive (with a USB-C adapter) which will be the target for the backup. Ideally it will be at least the same size as your phone’s storage, which for a Pixel 3a is 64GB.
The data which Seedvault backs up doesn’t include your phone’s shared storage, and backups for that will be handled in the next step.
-
Go to Settings > System > Backup
-
A 12-word recovery code is displayed. Record it somewhere secure.
-
Tap the CONFIRM CODE button.
-
Enter the recovery code and tap the DONE button.
-
Plug the flash drive into the phone.
-
Tap CANCEL in the F-Droid Open F-Droid to handle… dialog.
-
Tap your flash drive’s name on the Choose where to store backups screen.
-
Toggle Backup my data to on on the Backup screen.
-
Tap the 3 vertical dots icon in the top right corner of the screen and select Backup now to run your first backup.
Step 22: Set up shared storage backups
Because Seedvault doesn’t back up the phone’s shared storage, we need to back up shared storage in a separate step.
I recommend backing it up to a second flash drive which is fully encrypted.
-
Plug the flash drive into your computer, then mount and unlock it.
-
Connect the phone to the computer.
-
Copy the phone’s shared storage to the flash drive.
It may not be necessary to do this right now, as you’ve just set your phone up and the amount of data in shared storage is probably minimal. This is a procedure you should carry out regularly from now on though.
I had wanted to be able to recommend a way to back up shared storage directly from the phone into an encrypted container on the same flash drive we used for the Seedvault backup in the step above. I experimented with using the EDS Lite app to do that, but couldn’t find a way that was simple and robust, so I think the method I’ve recommended is the best for most people.
Step 23: Deactivate USB debugging
You don’t need to have USB debugging switched on any more, so it makes sense to turn it off now.
- Go to Settings > System > Advanced > Developer options and toggle USB debugging to off.
Do you really need an email app?
This guide doesn’t mention installing an email app because I don’t think it’s something that should be done without careful thought.
Many peoples' email contains a lot of information about them. It can also be used to reset important passwords.
If you lose possession of your phone while it’s unlocked, which is entirely possible given that it’s a device you use in one hand in public places, your email app will be available to the person who finds or takes it.
I’m not saying you shouldn’t install an email app, but I am saying that unless there is a compelling reason for you to have access to email on your phone, consider not installing one.
Try out other apps too
Many non-FOSS apps with Play Services dependencies can be installed from Aurora Store and will often work with more functionality than you might expect.
If you’re not sure about an app, just try it. You might be pleasantly surprised.
GrapheneOS is fantastic
I’m thoroughly enjoying the de-Googlified GrapheneOS experience. I’ve been using it for the best part of six months now, and I can’t fault it in any way at all.
I really do feel like at long last I’ve found the holy grail of mobile.