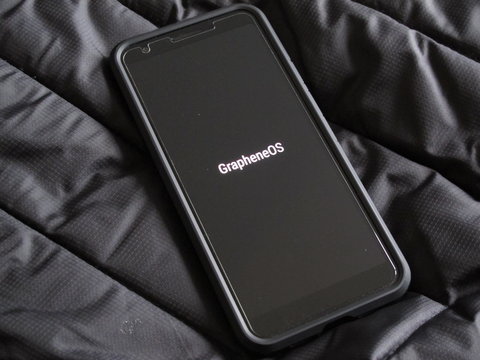
Although it’s not officially recommended or supported, it is currently possible to install and use the Google Camera app on GrapheneOS.
I’m generally reluctant to use Google apps, but for me my phone is as much a camera as it is anything else, and it’s important to me that it takes the best photos possible.
I’ve found that on the Pixel 3a, Google Camera produces photos which are much better than either the camera app bundled with GrapheneOS, or Open Camera which is the recommended alternative to the bundled camera app, so I use it.
Caveats
It’s important to know that although Google Camera works on GrapheneOS as of late July 2020, because it’s not officially supported, it could stop working with any GrapheneOS update.
Also, I don’t have any advice to give on the privacy or security implications of installing it. I’m simply saying that it can be done and explaining how to do it.
So with those caveats, if you want to install Google Camera on GrapheneOS, here’s how.
Step 0: Before you install GrapheneOS
To be able to install Google Camera on GrapheneOS, we need its APK.
The best way I’ve found to get it is from the unmodified Android installation which is on the phone before it’s replaced with GrapheneOS.
If you’ve already got GrapheneOS on your phone, you’ll have to skip this step and get a copy of the Google Camera APK another way. I don’t know what he best way to do that is, and it’s outside the scope of this article.
Assuming your phone is still running its original Android OS, connect it to a computer which has adb installed.
On your computer
Find the Google Camera APK:
$ adb shell pm list packages -f | grep Camera
You should see output that looks something like this:
package:/data/app/com.google.android.GoogleCamera-qZPbUKL67-BntCK8Sl_-xQ==/base.apk=com.google.android.GoogleCamera
Presumably this path will change over time, so adjust the path in the next command with your output and don’t just cut and paste it.
Copy the Google Camera APK to your computer:
$ adb pull /data/app/com.google.android.GoogleCamera-qZPbUKL67-BntCK8Sl_-xQ==/base.apk GoogleCamera.apk
Now we’ll put it aside for the time being and use it later.
Step 1: Install GrapheneOS
Follow the GrapheneOS installation guide and come back here when you’re done.
Once you’ve finished installing GrapheneOS, keep your phone connected to your computer and make sure you have USB debugging toggled to on in Settings > System > Advanced > Developer options.
Step 2: Install F-Droid
F-Droid is a catalogue of free open-source (FOSS) Android apps. It’s like the Google Play Store, but all the apps it contains are FOSS.
You’ll need F-Droid to install microG Services Core in the next step.
-
Go to Settings > Apps & notifications > Advanced > Special app access > Install unknown apps > Vanadium.
-
Toggle Allow from this source to on.
-
From the home screen, open Vanadium by tapping the greyscale Chromium icon and browse to https://f-droid.org.
-
Tap the DOWNLOAD F-DROID button.
-
Tap Download in the Download file dialog.
-
Tap OK in the This type of file can harm your device notification.
-
Once the FDroid.apk file has downloaded, tap Open in the notification.
-
Tap INSTALL in the F-Droid Do you want to install this application? dialog.
-
Tap DONE in the F-Droid App installed dialog.
Step 3: Install microG Services Core
microG Services Core (or GmsCore) is a FOSS implementation of Google’s Play Services.
Google Camera needs it to work on GrapheneOS.
-
In F-Droid, tap Settings > Repositories, then tap the + button in the top right corner of the screen. You’ll see the Add new repository dialog.
-
In Vanadium browse to https://microg.org/download.html.
-
On that page you’ll find the address and fingerprint of the microG F-Droid repository. Copy and paste them into F-Droid’s Add new repository form.
-
Tap ADD in the form.
-
Go to the F-Droid Latest screen, search for microG Services Core, then install it.
-
In the F-Droid For your security, your phone is not allowed to install unknown apps from the source dialog, tap SETTINGS.
-
Toggle Allow from this source to on, then tap the back arrow in the top left corner of the screen.
Step 4: Install Google Camera
On your computer
From the directory you saved the Google Camera APK into in Step 0, this will install it:
$ adb install GoogleCamera.apk
On your phone
-
Open the App Drawer, long-press on the second Camera icon (grey camera in white circle), then tap the i icon in the popover which appears.
-
Tap Permissions.
-
Move Camera, Location, Microphone and Storage from the DENIED list to the ALLOWED list.
-
Move Network from the ALLOWED list to the DENIED list. The aim of doing this is to have GrapheneOS prevent Google Camera communicating with the outside world and leaking your data.
Step 5: Install Aurora Store
Aurora Store is a FOSS client for the Google Play Store.
You can use it to install apps which are available for free in the Google Play Store.
You’ll need Aurora Store to install Google Photos in the next step.
-
In F-Droid, find and install Aurora Store.
-
Open the App Drawer, long-press on Aurora Store, then tap the App info popover which appears.
-
Tap Permissions and move Storage from the DENIED list to the ALLOWED list.
-
Go to Settings > Apps & notifications > Advanced > Special app access > Install unknown apps > Aurora Store.
-
Toggle Allow from this source to on.
-
Open Aurora Store.
-
On the Welcome screen tap NEXT.
-
On the Accounts screen tap ANONYMOUS. This will allow you to install apps without having to authenticate to the Play Store with a Google account of your own.
Step 6: Install Google Photos
Google Photos is a photo viewing or gallery app.
It works with Google Camera to view photos from within Google Camera. The default Gallery app doesn’t seem to open photos from within Google Camera, so we’ll use Google Photos as our gallery app.
-
In Aurora Store, find Google Photos and install it.
-
Open the App Drawer, long-press on Photos, then tap the App info popover which appears.
-
Tap Permissions.
-
Move Storage from the DENIED list to the ALLOWED list.
-
Move Network from the ALLOWED list to the DENIED list. The aim of doing this is to have GrapheneOS prevent Google Photos communicating with the outside world and leaking your data.
Enjoy your photos
I’m still regularly amazed by what a great job the Google Camera app does.
At least for the time being, this is how it can be made to work on GrapheneOS.